
The DIY project of the week for me has been a fusion of mesh technologies and weather sensors, brought together with a Wifi backbone powered by a Raspberry pi.
I've built a number of Meshtastic systems equiped with environmental sensors but I wanted to try my hand at Meshcore this time to evaluate its capabilities. Since MeshCore supports a number of basic sensors I figured I could use my existing Meshtastic radio and its sensors already attached.
Unfortunately unlike Meshtastic that ships the entire kitchen sink in a single binary package, MeshCore takes a more narrow, focused approach at its featuresets. This means that while technically the firmware supports sensors, support is only compiled into the image for manufacturer supported sensors for that device.
This means that the RAK Wireless sensor modules for the WISBlock platform should generally work with MeshCore, but an aftermarket GPS or environmental sensor for a Heltec radio probably won't work unless you compile your own firmware from source.
The Raspberry Pi is a general purpose computing device, which means you can load whatever software you need to do the job, without having to recompile the damn Kernel, (usually).
If you don't have a spare Pi laying around, Microcenter usually has them or you can pick them up from Amazon, or any number of retailers. It doesn't matter which Pi you use for this project, as long as it has a 40-pin GPIO header or connections. (The Pico for example does NOT offer this GPIO header.) I recommend the Zero W or Zero 2 W for this project because they can still be found for under $15 from most locations.
Let's start with the reasonably priced BME280 environmental sensor.
Important Note, I am using the BME280 here, not to be confused with the BMP280.
The BMP280 does NOT include humidity sensors, (though technically would work fine, just without that measurement).
 {data-fslightbox="content"}
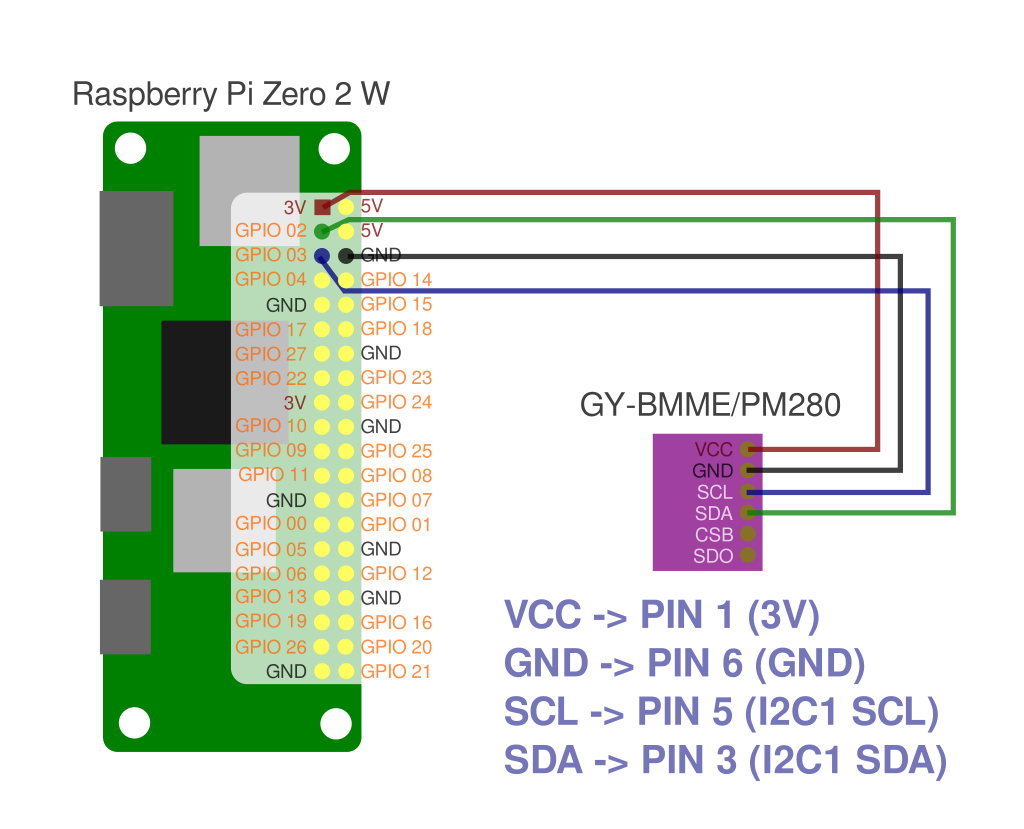
Wire the BME280 to the PI with the following layout:
This wires the temperature/pressure/humidity sensor to the I2C serial bus of the Raspberry Pi. Power is provided by the 3v rail on pin 1, cross directional data by SDA (serial data), and clock on SCL (serial clock).
When mounting the environmental sensor, it is important to mount this away from any processor or radio to minimize sensor interference. In my build, the components are mounted inside a sealed outdoor project box which tends to heat up slightly. To get a more accurate reading my BME280 sensor is mounted on the underside of the box partially sealed with electronics grade silicone. (Take caution not to cover the sensor itself as it needs direct access to the ambient air.)
 {data-fslightbox="content"}
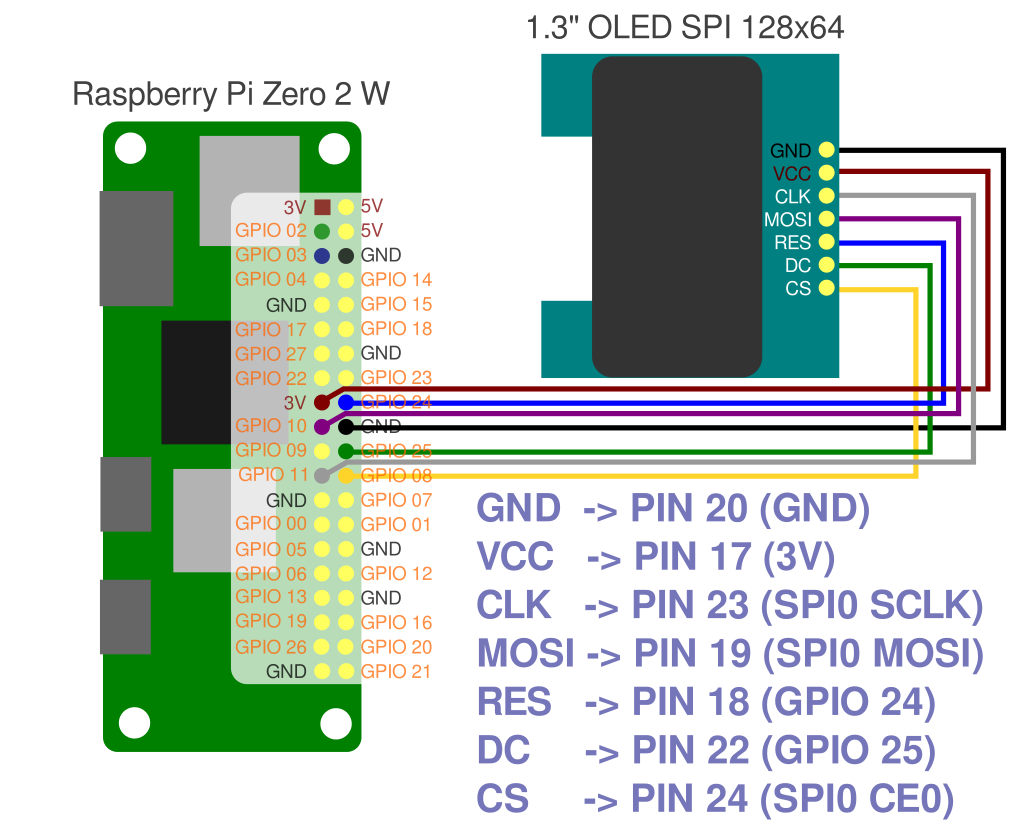
The 128×64 pixel OLED display has a few more connections and uses the SPI protocol instead, (though I2C displays are also available, but they would be wired differently). The display used in this project is the Inland 128×64 Display for Arduino - part 345785 and is available for about $8.
The radio has a USB-C connector and plugs into the Raspberry Pi's USB host port. For my build I am using a short right-angle USB-C to right-angle micro-USB cable. A USB hub with a micro-USB plug can also be used to add more devices to the host. Power is generally only limited to what the total input can provide as the power traces are bridged directly on the Raspberry Pi Zero.
If you are using a standard Raspberry Pi with USB-A ports, use a standard USB-A to USB-C cable to connect to the radio.
Any LoRA / MeshCore / Meshtastic radio with USB support will work for this project. A Heltec V3 ESP32 just happened to be the radio I had available for this project.
In my build, I am re-using a previous project where the radio already had sensors and GPS connected, but sadly those sensors are nonfunctional with MeshCore.
Before deploying the radio in this project, plug it into a desktop to flash MeshCore and configure as desired. It should be a companion USB firmware so it can enable the USB interface. Ensure to set an appropriate device name and region settings so it uses the right frequency for your country.
Install Raspbian OS on a micro-SD card to prepare the Raspberry Pi. For this project I highly recommend the "minimal" version as it does not provide a desktop. Since the Zero only has 512MB of system memory, a full desktop would be too heavy for the device, (plus it would be a waste as there is no monitor connected!)
For initial configuration, use a mini-HDMI to HDMI cable to connect the Pi Zero to a screen and connect a keyboard to the host USB port. This is unfortunately needed with newer versions of Raspbian as it does not set up a default user and prompts on initial start-up.
Once the Raspberry pi is running and an account is created, enable SSH and configure wireless so you can access the device over Wifi. Once done, you can ditch the screen and keyboard.
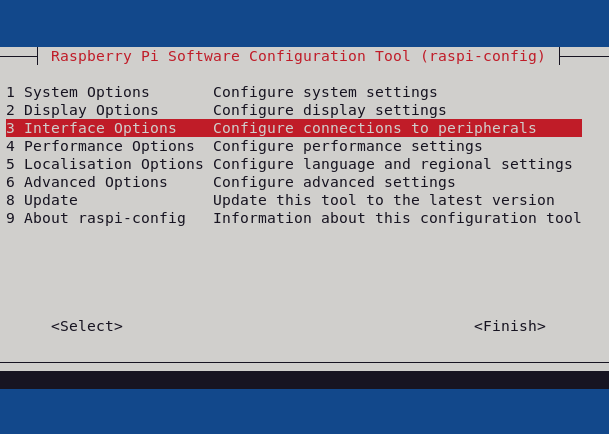
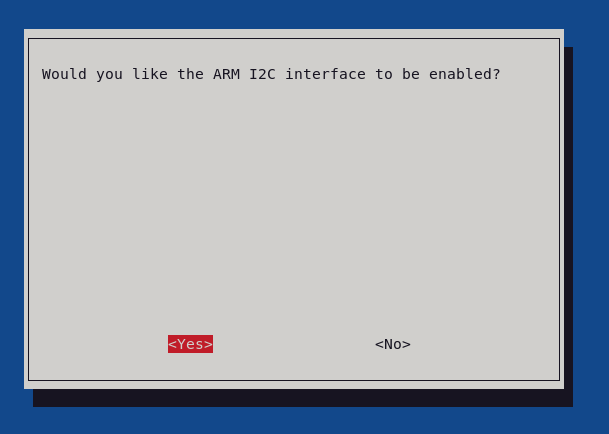
Run raspi-config to enable the SPI and I2C interfaces on the SOC.
sudo raspi-config
 {data-fslightbox="content"}
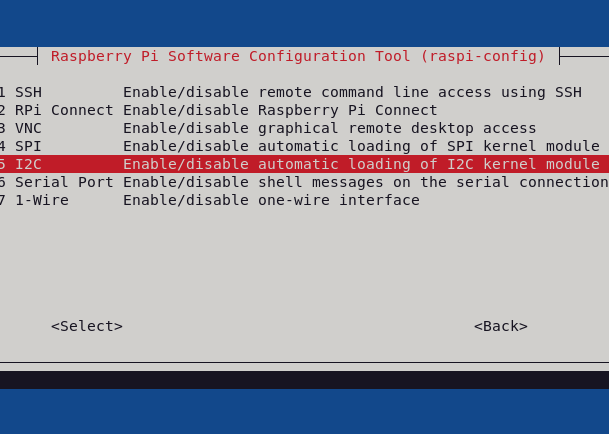
Inside the "Interface Options" menu, enable both SPI and I2C.
 {data-fslightbox="content"}
 {data-fslightbox="content"}
Once enabled, grab git and the code for this project.
# Git is a requirement for using .... git
sudo apt install git

# I prefer vim for editing files, but you may use different editors like nano.
sudo apt install vim

# Checkout the code
git clone https://github.com/BitsNBytes25/Raspberry-Pi-Mesh-Weather.git
cd Raspberry-Pi-Mesh-Weather

# Copy .env.example to .env and edit as needed
cp .env.example .env

# Or nano .env; whichever you prefer
vim .env

# Run the install script
chmod +x install.sh
./install.sh
Pro-Tip: Take a moment to read .env as it contains important values such as credentials needed for connecting to Home Assistant and setting your altitude for proper MSLP calculation.
The installer for this project will add all dependencies required and install the various services so they auto-start. The services are:
 {data-fslightbox="content"}
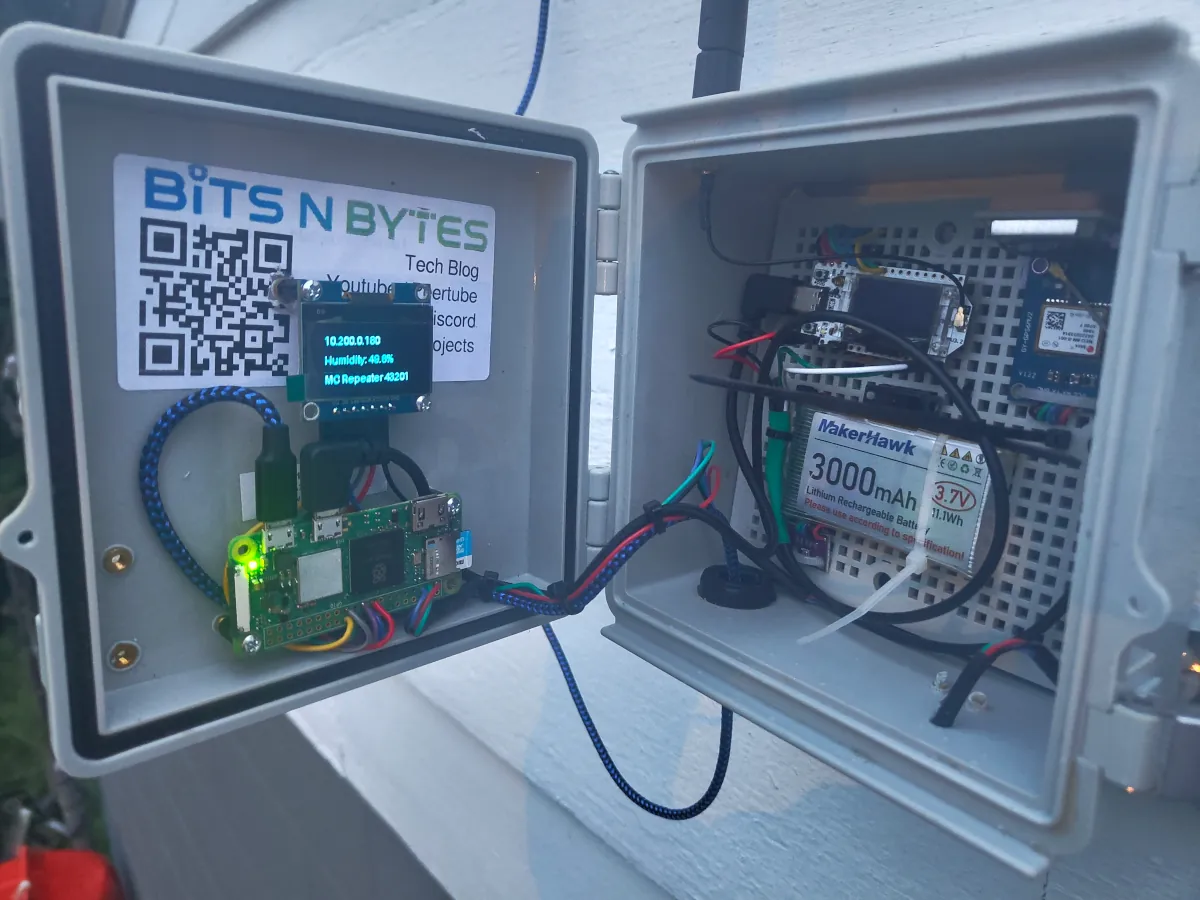
While not required depending on what you want to monitor, I wanted to monitor outdoor conditions, so I installed this radio in a waterproof enclosure on the side of my garage. It's well within range of the wireless for uploading results to Home Assistant and has an even farther range on the Mesh.
Pro-Tip: The Raspberry Pi draws significantly more power than a MeshCore radio; when plugged into mainline power via a USB power brick this is not an issue, but take note of power usage if you are running this off a solar panel and battery!
Mesh-watcher and sensor-watcher are the two primary services that will be doing the heavy lifting.
The sensor service logs data to /tmp (as it is a RAM-only filesystem to minimize writes to the SD card) and handles pushing metrics to Home Assistant (if enabled).
The mesh service monitors the MeshCore network for keywords and activity. When asked about the temperature, it will look up the latest sensor readings from /tmp as logged by the sensor service and formulate a response.
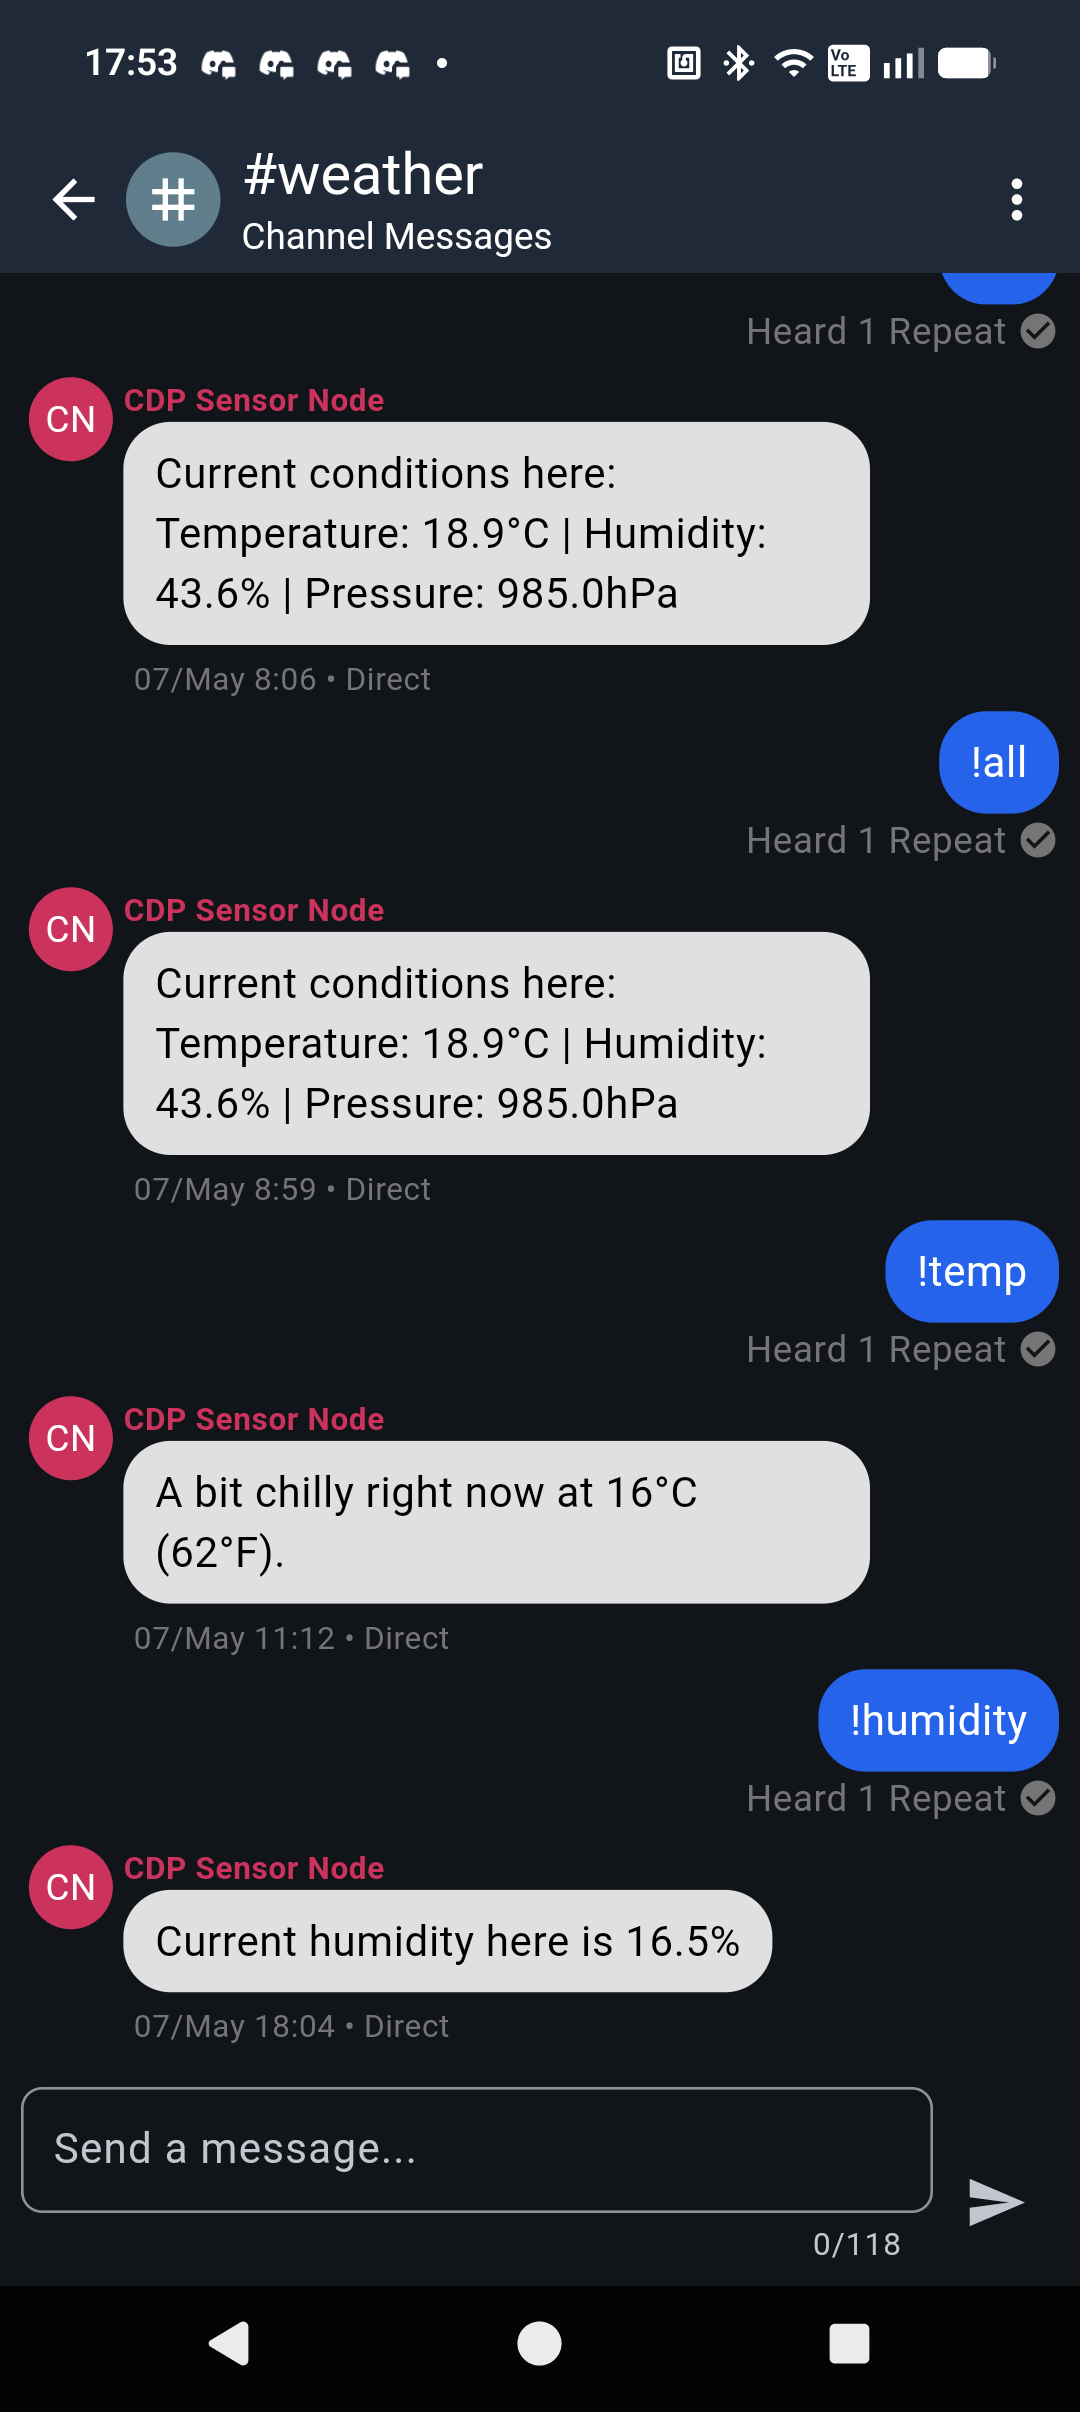
Some examples of possible output:
The channel #weather is monitored for group messages where anyone can ask about conditions in that channel. Replies are sent to the group for anyone to view. This public channel is subscribed automatically on service start.
 {data-fslightbox="content"}
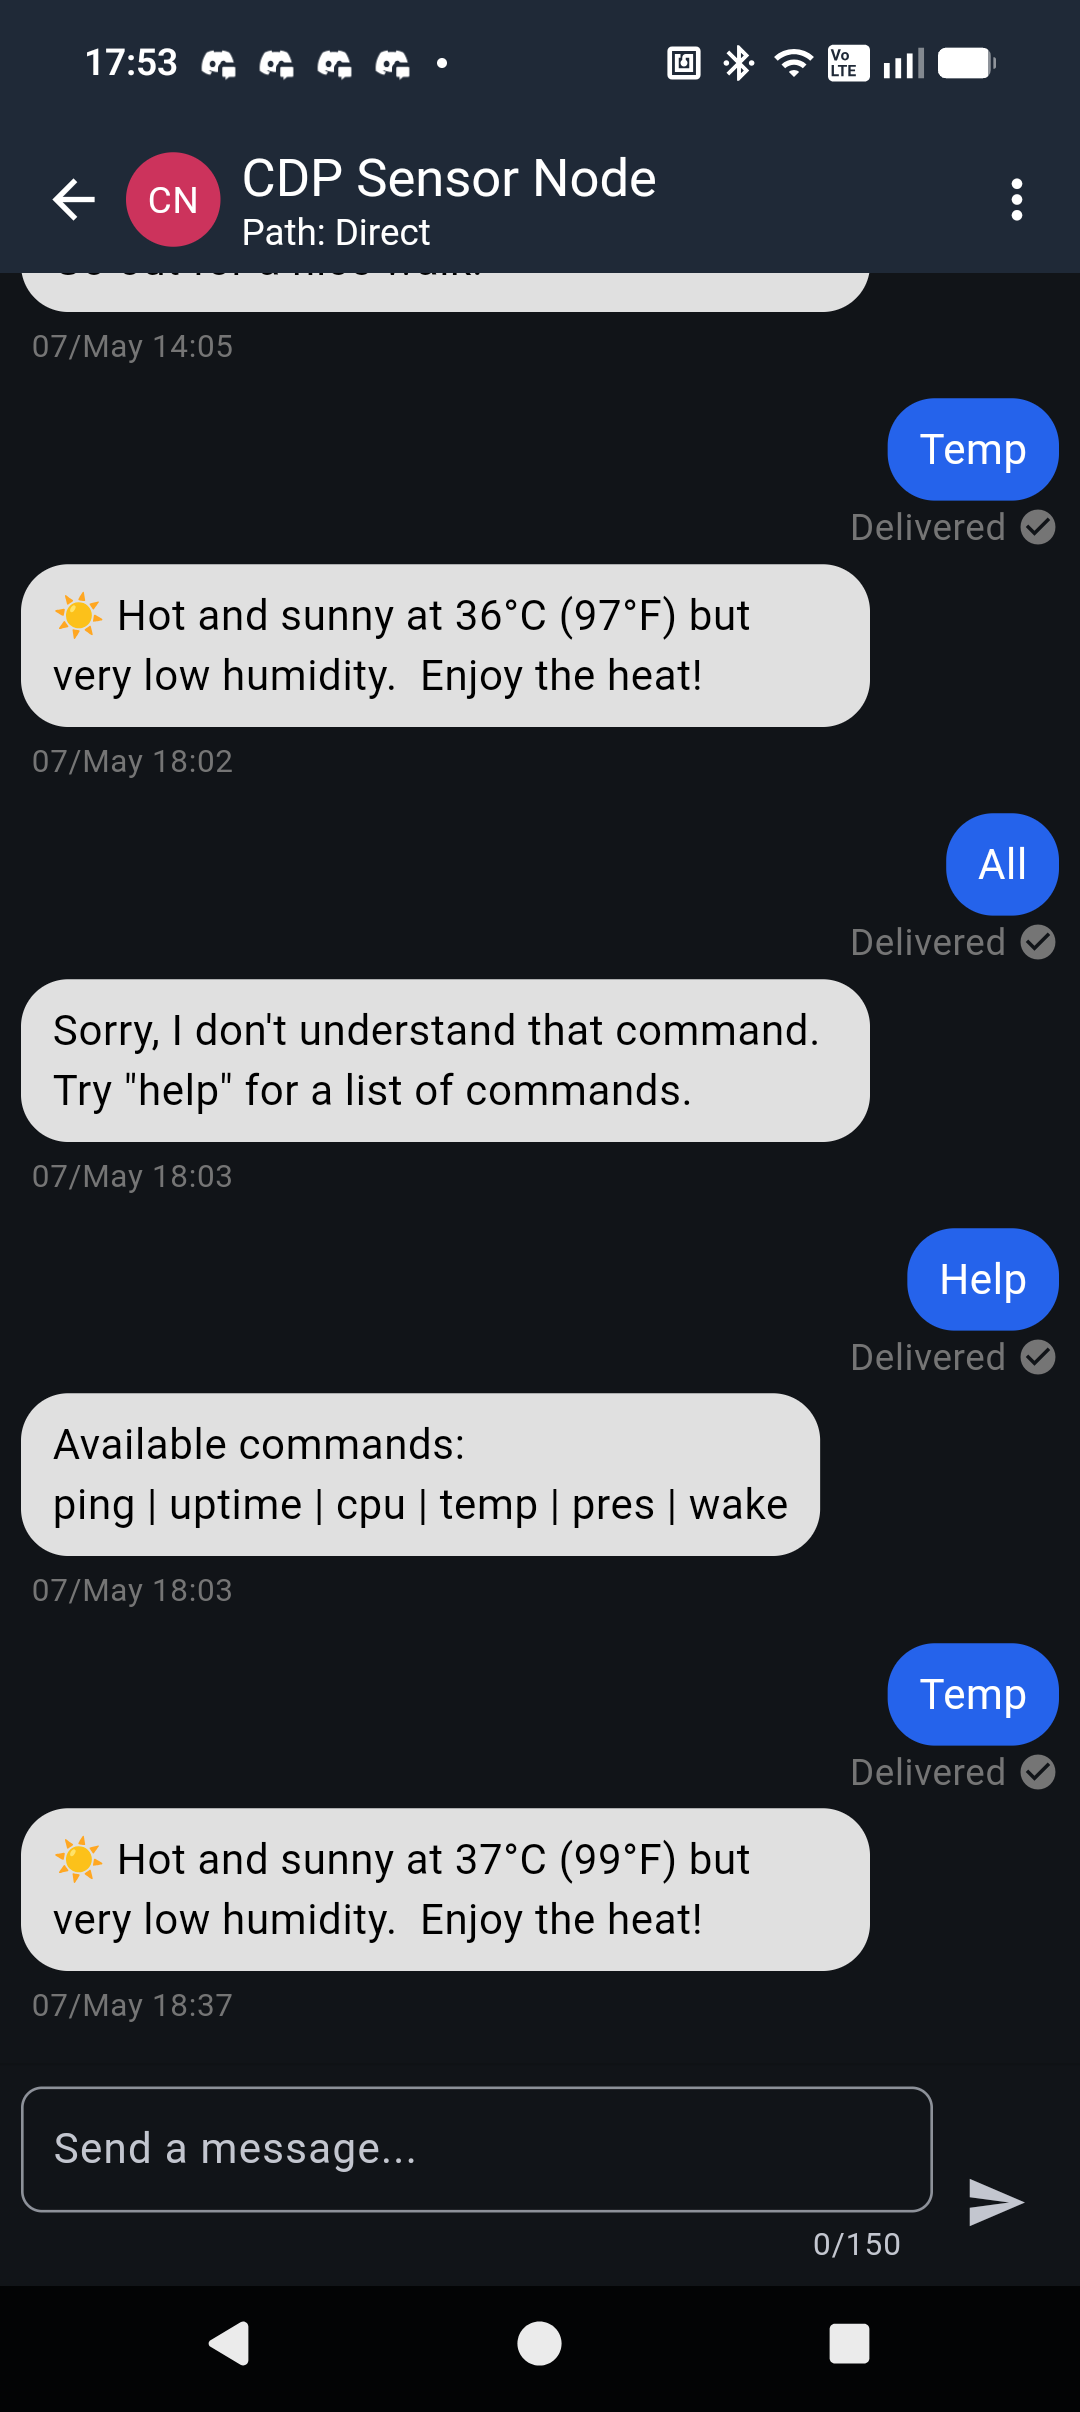
The service will also listen for direct messages and will behave in a similar fashion. For direct messages the reply is sent directly to the querying radio.
 {data-fslightbox="content"}
This direct message interface also allows you to send commands like "cpu" to get CPU stats or "wake" to wake up the OLED display. This wake is useful because this project will generally keep the display asleep to save CPU cycles, electricity, and wear on the screen.
When woken up, the screen will rotate through three sets of information:
In addition to interacting with remote MeshCore nodes and displaying some metrics locally, the service can push metrics to Home Assistant for logging and viewing of historical stats.
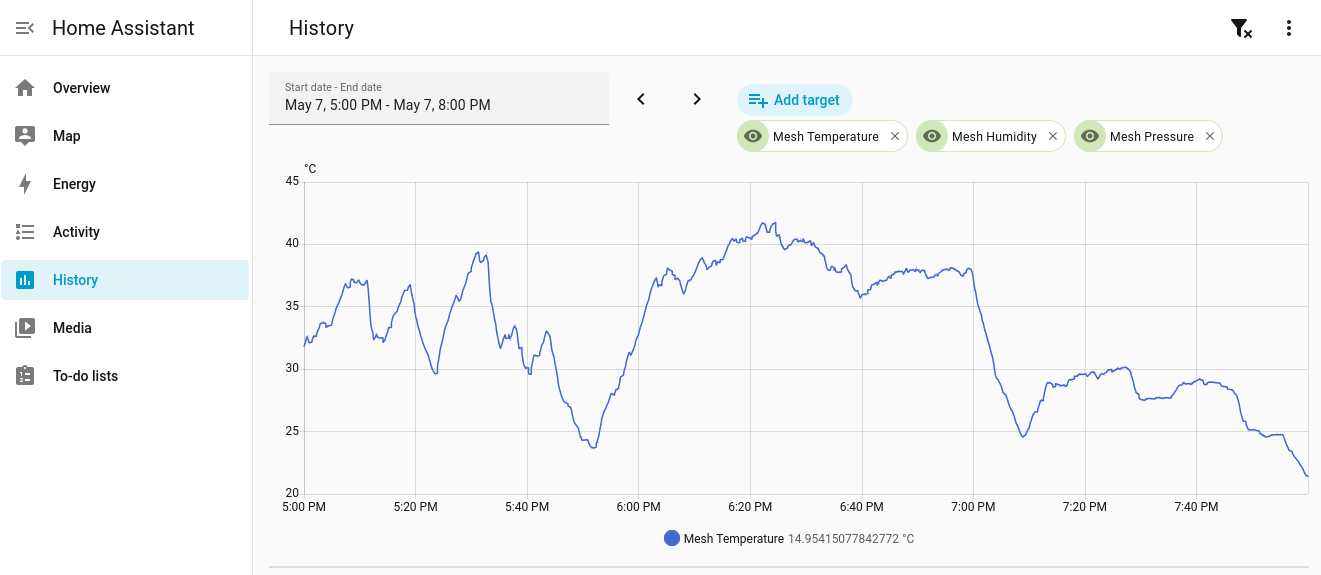 {data-fslightbox="content"}
The nodes visible are also logged, to make your own local map of MeshCore nodes in the area.
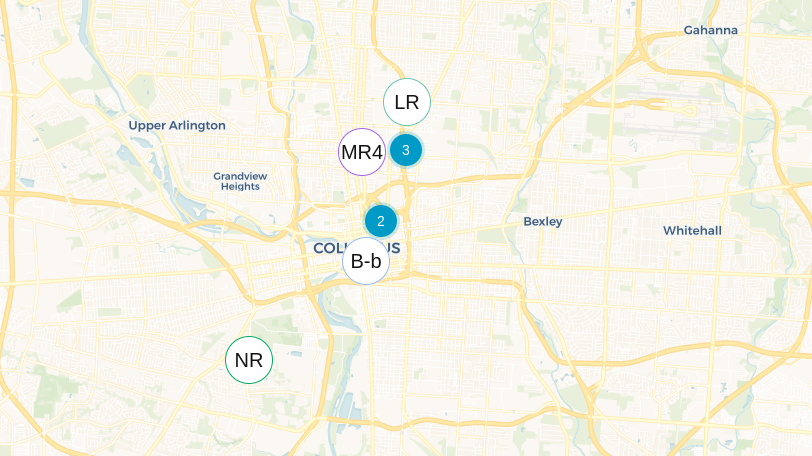 {data-fslightbox="content"}