
Ads, ads, and more ads. Data data and more data. The more we browse the more they take. The more we use our products the more information they sell. What if I told you there was a way to block tons of not only ads, but trackers, and devices that phone home for no other reason than to tell their creators what you are doing?
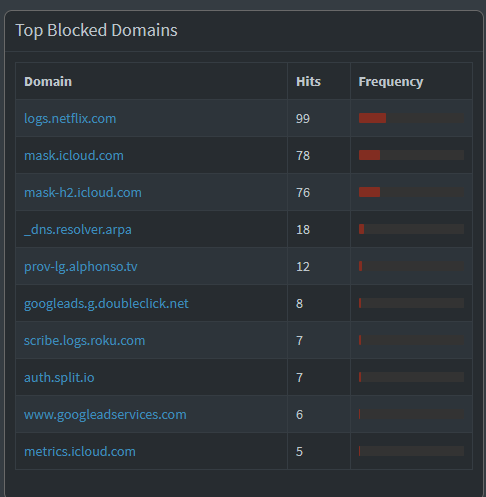
In this photo you can see how many times our devices are telling on us. Kind of makes you wonder how much of our internet traffic are we paying these folks to use for us.
Side note. You can also access the you tube video that I made a few years ago if you prefer to watch rather than read.
Well, that's exactly what I plan on telling you today. How to set up your own instance of a pi - hole. A pretty famous little software package that allows you to stop the snooping and browse in peace.
What will I need?
What do I do?
install pi hole
More information can be found here
So you don't actually have to use a pi if you don't have one or do not want to buy one. Any old computer can work. The difference is what type of program you install. Pi Hole has an X86 version and an ARM version.
This guide will go over the x86 version as I will be installing an instance on my proxmox server.
However, if you have a raspberry pi you can install raspian lite, which is command line only. This is the easiest way to run the Pi Hole if you have one laying around. On windows or mac simply download the pi imaging software and write the appropriate ISO to an sd card.
If you are running linux, I am going to assume you can handle that part.
As with any linux software we want to make sure that we have the latest list of packages.
sudo apt update
Let's go ahead and install them now that we have an up to date list:
sudo apt update
Obviously if we have no GUI we probably want to stick this guy in a closet or something and forget it exists. The easiest way to do this is with SSH. Most of the time ssh is already present on the install but we always want to be sure. It can be pain later.
Lets ask the computer if ssh is running:
ps -ef | grep sshd
It should look like this:

If it doesn't you probably want to go ahead and set that up.
On the pi you can do this within the raspi-config.
sudo raspi-config
Navigate to interface options and hit enter.
From there select ssh and press enter
Choose yes to enable the ssh server and press enter.
Finish and reboot.
Go ahead and give it a shot. You should now be able to connect using putty or terminal and access your pi over the network.
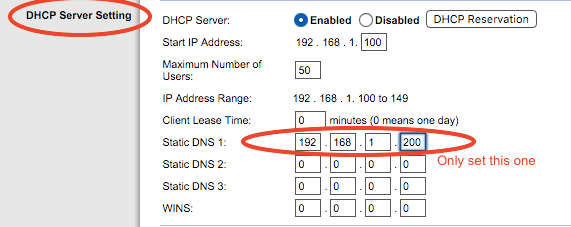
Utilizing pi-hole requires you to point all your pc's at it as the primary DNS server. This can be acheived manually, by editing each computer's DHCP settings, or automagically by assigning it in your router.
Many ISP's will have your router forwarding the THEIR dns servers. They do that so they can see what you are doing and sell that data to the highest bidder. So you will want to go into your router and change those settings to the STATIC ip that you set for the Pi.
Depending on how your network is configured, the DHCP server should now route traffic through your DNS server.
But we should probably go ahead and get that working and test it first!
The other thing we must consider is that we have to assign the pi a manual ip address. This can be done pretty easily through the setup, but we want to go ahead and make sure that we don't assign the server an ip already in use, or one that your router might give away to someone else.
You will want to look at your router and determine which addresses its handing out and which ones are open. Or you can simply add a DHCP reservation which will automatically give your device the ip address every time based on its MAC address. This is the recommended way.
Every router is different so I recomend you search for DHCP reservation (your model router here).
The install is actually super easy. Pi-hole has placed a script online for us to use. All we have to do is download it and run it! A word to the wise when running commands from strange websites be careful that you know what they are doing.
You could not do the | bash part and then open it with nano or vi first to make sure that you know what its doing.
curl -sSL https://install.pi-hole.net | bash
Bam it will run a few checks ask you for your sudo password and then open the installer.
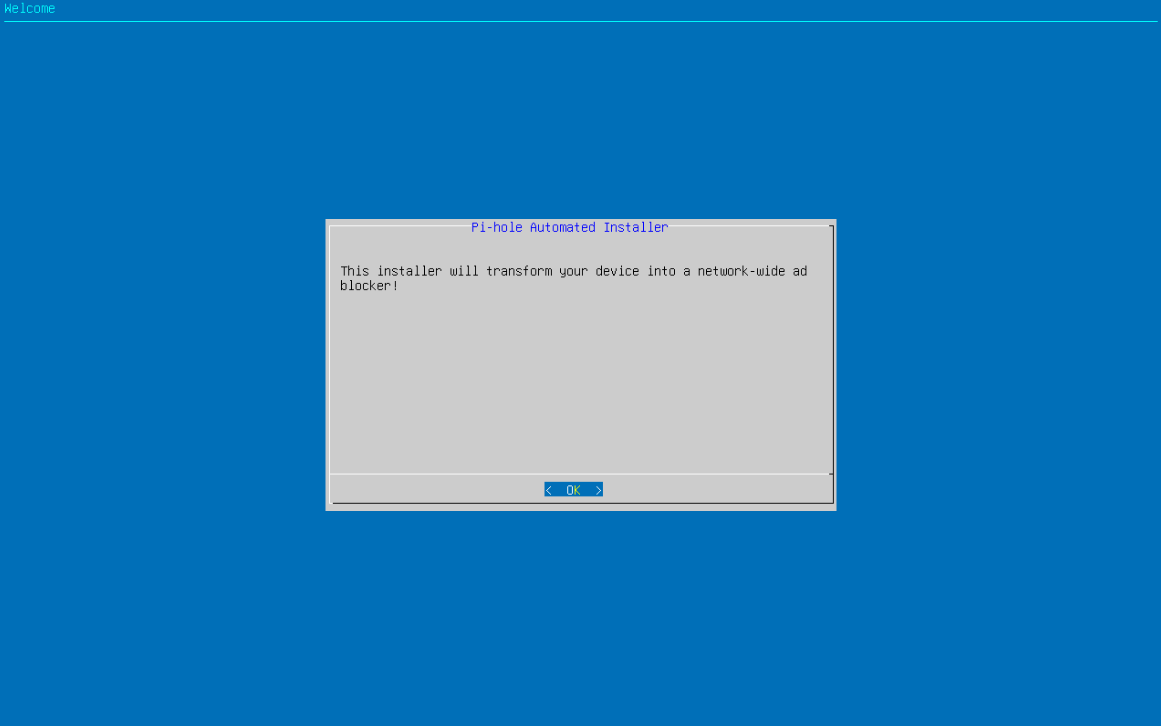
Hopefully you see the above screen.
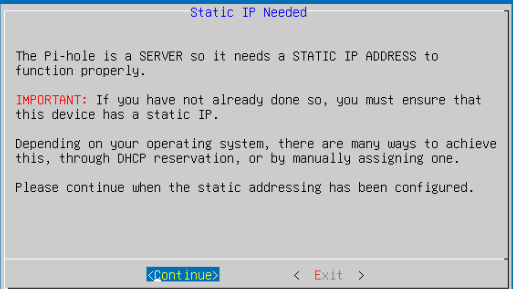
Next its going to warn us about that static IP we talked about earlier:
Once we click continue the installer is going to ask you which upstream DNS provider you want to use. I would say that google is probally the most popular option, but I have found that Open Dns is probally my favorite.
Open DNS doesn't log your information or sell it to third party data brokers (allegedly). Ill go ahead and select that one.
The next section asks about blocklists. Pi Comes with StevenBlack's Unified hosts list. This contains a ton 82k last i knew and is updated frequently.
The way the pi-hole works, is if a server is on that blocklist it doesnt allow the traffic to your network. This is what blocks the ads. (or other things). You can find tons of block lists and other things that you can add after the install.
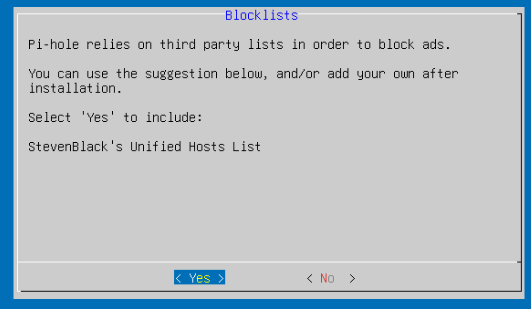
Go ahead and click yes if you want it or no if you dont.
The next thing it asks you is if you want query logging. I reccomend you do. This gives you information on what devices are requesting what and can help you see that your pi-hole is working.
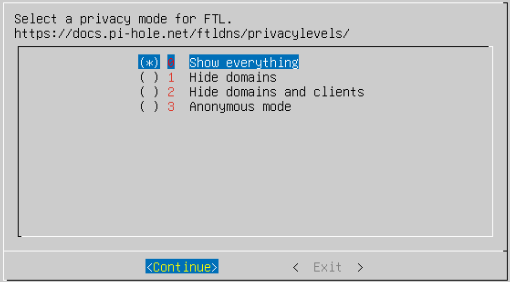
The installer now asks which privacy mode you want the logging to use. Again just select 0 because your pi is on your own network and local to you. This will give anyone who has access to the admin password of the pi data about what dns servers your network is talking to so if its a shared resource you may want to enable some features.
Thats it!
It finishes things up for you and prints out important information.
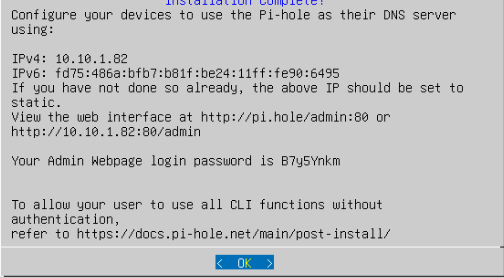
Note the admin page login. Very important. (I actually forgot once but there is a command you can use through SSH to change it.)
Navigate to your ipaddress / admin and login
10.10.1.82/admin for me.
That's pretty much it. Now go ahead and change those dhcp servers in your router!
More help and how to do specific things on the pi-hole can be found on their docs website.